Deploy from Claude Code with the Shipvela CLI
Claude Code can run Shipvela’s existing terminal commands from your project. Give it a specific build directory and deployment task, then check the CLI’s job result before treating the site as live.
Updated
Choose what Claude Code should publish
This workflow uses Claude Code in a terminal with the existing Shipvela CLI. You do not need a Shipvela-specific agent plugin. Claude can inspect files, run the build and invoke a command, but the hosting path still depends on what the project produces. Start with that decision before giving an agent deployment access.
| Project in your folder | Correct next step |
|---|---|
| Plain HTML, CSS, JavaScript and images | Publish a clean directory containing index.html. There may be no build step. |
| React/Vite browser app | Build first, then publish the generated dist directory. Enable SPA routing for a new client-routed project. |
| Already linked GitHub project | Commit and push reviewed source, then explicitly deploy the linked remote branch. Local edits are not uploaded. |
| Server routes, database migrations or a long-running process | Stop and identify hosting requirements. A static upload cannot run that backend. Supported Next.js 12–15 SSR has a separate paid-plan path. |
An exported chat artifact and a working local project are different inputs. Download the complete source and assets, not just a screenshot or preview link. For a reproducible starting point, use the React/Vite source fixture and its build walkthrough. The fixture makes no external API calls.
Prepare the same terminal environment
- Install and sign in to Claude Code using Anthropic’s current setup instructions. Installation methods change, so use that reference for the agent itself.
- Install Shipvela CLI using the CLI setup docs. This guide checks the 0.3.0 command surface. Use Node 22.12+ for the accompanying Vite 8 fixture.
- Open the intended project directory. Inspect package.json, the lockfile and any existing shipvela.json before running commands that create or update a project.
- Use a Shipvela account whose project and deployment limits allow the work. A GitHub connection is unnecessary for a prebuilt upload.
pwd
node --version
shipvela --version
shipvela login
shipvela whoami
shipvela projects --json
Run interactive login yourself. Approve only the matching code shown by your terminal in the intended Shipvela account. Do not paste the resulting token into Claude’s prompt. After login, the CLI can use saved credentials in that environment. An agent in a container, remote machine or different home directory may not share your local login; check whoami there instead of copying credential files blindly.
Inspect shipvela.json as project identity, not as disposable clutter. If the folder is already linked, compare its project ID with the projects list. For an existing project, use shipvela link --project PROJECT_ID with the intended ID rather than creating a duplicate. The CLI docs cover the full command options.
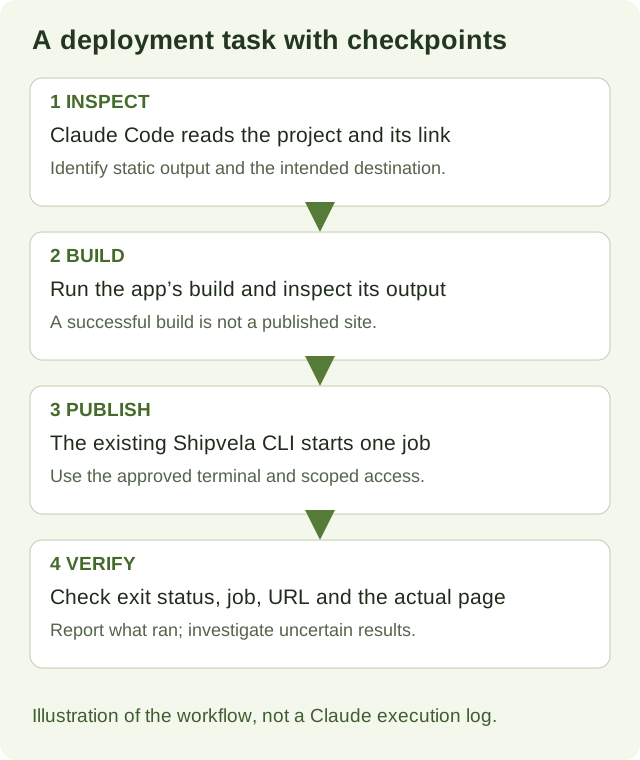
Checkpoint 1: ask for an inspection before publishing
Prompt to adapt to your own project
Inspect this folder without deploying. Identify the framework, package manager, build command and output directory. Read any shipvela.json and report the linked project ID and whether it is an upload or GitHub project.

Explain whether the output can run as static browser files. Flag server-only routes, backend processes, missing environment values and references to localhost. Do not read or print credential values. List the exact commands you propose and the evidence that would show a successful build.
Review the answer against the files. A dist folder left by yesterday’s build does not prove today’s source compiles. If Claude proposes a different framework or hosting path to fix a small build error, pause that change and diagnose the first substantive error. The job here is to publish the intended site, not silently replace its architecture.
| Question | Evidence to request |
|---|---|
| What will be uploaded? | Exact output path and index.html; no source root or dependency directory. |
| Where do public values come from? | Variable names and build location, without printing private values. |
| Which site will change? | Existing linked project ID, or explicit new project name. |
| Does routing need fallback? | A client-side route that must load directly, such as /about. |
Checkpoint 2: build and inspect the artifact
A bounded build prompt
Build the static site from the committed npm lockfile. Run npm ci, then npm run build. If either fails, report the first actionable error and stop before publishing.

Check the generated index.html, referenced assets and public configuration. Preview the built output locally. Report which checks you actually ran, and which still need a browser or human review. Do not publish yet.
The downloadable fixture’s local commands
npm ci
npm run build
node scripts/inspect-build.mjs
npm run preview -- --host 127.0.0.1 --port 4173 --strictPort
The fixture inspector checks index.html, bundled public label, production mode and the absence of an unprefixed sentinel value. It is a fixture-specific assertion, not a generic security scanner. Open the printed local preview address, check the label and a direct /about load, then stop the preview with Ctrl-C. Vite preview is for local inspection, not the production hosting service.
Shipvela’s archive checks reject common unsafe inputs and exclude known credential filenames. They cannot remove a secret that a bundler already embedded in JavaScript. Public VITE_ values are readable by visitors; see the production environment guide.
Checkpoint 3: authorize one explicit publish
After inspecting the build, give Claude the exact project and output directory. This prompt authorizes the deployment; customize the name, routing choice and verification route before using it.
Publish the reviewed dist directory to Shipvela. Use the existing upload-project link if present. If there is no link, create the project named my-react-site with SPA routing. Do not change domains, billing or unrelated projects.

New upload project:
shipvela publish dist --name my-react-site --spa --json

Existing linked upload project:
shipvela publish dist --json

Wait for the job. Report the exit status, project ID, job ID, exact job status and returned URL. If the wait is interrupted or times out, inspect that job before retrying. Do not call a queued or running job complete.
Keep Claude Code’s permission controls enabled. Review the actual command, current directory and target project when a permission request appears. A command denial is a checkpoint to resolve, not a reason to bypass all permissions. You can run the publishing command yourself and ask Claude to help interpret the non-sensitive result.
For a new upload project, publish writes shipvela.json and uses the selected SPA setting. On an existing upload project, --spa does not repair or change routing, and there is no Build settings panel. Keep the existing project and domain intact and contact support before replacing it. The routing guide explains how to verify a separate SPA project from an unlinked directory if your quota permits. A GitHub-linked project requires the manual GitHub workflow, not publish.
Checkpoint 4: verify the receipt and the page
| Field or check | How to interpret it |
|---|---|
| Command and exit code | The command must actually have run; exit 0 alone is not visual QA. |
| projectId | Matches the intended project, especially after relinking. |
| job and status | A specific job with SUCCEED is the CLI success condition. Pending/running is unfinished. |
| url | Returned by the CLI; open it rather than accepting a guessed hostname. |
| Visible site and direct route | Check the new label/content, images and direct /about refresh. Test any separately hosted API. |
With --json, publish keeps progress on stderr and writes a result or error object to stdout. Save the non-sensitive receipt if you need a release record. Do not use a mock job, a screenshot of local preview or a prior deployment’s URL as evidence that this publish completed.
shipvela status --json
shipvela logs --job JOB_ID --json
Replace JOB_ID with the numeric ID of the operation you started. Status helps find the latest operation, while logs for that ID keep concurrent work from being confused with your own. If the terminal closes after upload, inspect status and that job first. Starting publish repeatedly can create extra builds without solving the original uncertainty.
Make the next update reproducible
Change one visible piece of content, build again, inspect the new output and publish through the existing link. Reusing a folder without rebuilding will upload stale files. Keep source changes in version control so you can reconstruct what generated the artifact.
Optional short CLAUDE.md section for this project
# Deployment workflow
- Static React/Vite build: npm ci, then npm run build.
- Upload directory: dist. Never upload the source root.
- Inspect shipvela.json before any deployment.
- Do not print secrets or place them in VITE_ variables.
- Publish only when the task explicitly requests it.
- Report the exact job ID/status and distinguish local checks from live checks.
Project instructions help the next session retain context, but they are not an access-control boundary. Anthropic explains how Claude Code reads project memory. Keep command permissions and token scopes appropriate as well.
Recover from concrete failures
| Observed failure | Check | Recovery |
|---|---|---|
| shipvela: command not found | PATH and CLI version in the agent’s terminal | Fix installation/PATH there, then restart that terminal session. |
| Not logged in to this server | whoami and intended API origin | Login to the intended origin; credentials are origin-bound. |
| Read-only token cannot publish | Token scope in CLI & integrations | Use an authorized deployment token; do not expose it in a prompt. |
| Directory is linked to a GitHub project | shipvela.json and projects list | Use deploy for that remote source, or intentionally choose a separate upload project. |
| index.html missing / source root rejected | Actual build output directory | Fix the build or publish the correct output folder. |
| Timeout or closed terminal | Latest status and specific job logs | Resume verification; retry only after knowing the prior outcome. |
| Successful job, wrong page | Project ID, visible build label, browser requests | Correct target/artifact, rebuild and republish the intended project. |
Tokens expire after 90 days and can be revoked in Settings → CLI & integrations. shipvela logout revokes the current token and removes matching saved credentials. Headless runners should obtain tokens from their secret store using the documented agent authentication flow; never embed a token in source, a command argument or an agent transcript. Deployment tokens do not administer domains, environment variables, GitHub credentials or other tokens.
What was tested for this guide
The accompanying React/Vite fixture was built locally on Node 22.20.0 with Vite 8.3.1 and React 19.3.0. Its public-variable and artifact checks were executed. Separate CLI tests exercised the actual 0.3.0 command logic against a synthetic local API, including failure paths. No Claude Code session was run for this guide, no live Shipvela site was deployed and no cloud success screenshot is implied. The prompts and production commands above are instructions for your own authorized workflow.
Static hosting does not provision a database or make every AI-generated app compatible. If the inspection finds TanStack Start, a server adapter or another unsupported backend, resolve that architecture before giving an agent a publish task.